April 2, 2023
The Gerber engine house leads have been installed. Photo shows DAP caulk on roadbed just prior to installing switch assembly. The 5 switch assembly consisted of 2 groups of two switches along with a single. I try to construct switch assemblies in multiples because they flow better and require fewer rail joiners.
The track is code 70 and Micro Engineering rail joiners are used. Love them in that they are so small they become almost invisible. In order to get them easily on the rail, each rail is ground on the bottom with a Dremel. The joints are then soldered on the outside to make the assembly.
Assemblies were measured on full size plans so I know they will fit. If alignment is not quite parallel where needed, just heating up the Plibond that holds rail to ties makes adjustments easy. Rail gauges are used to insure track stays in gauge.
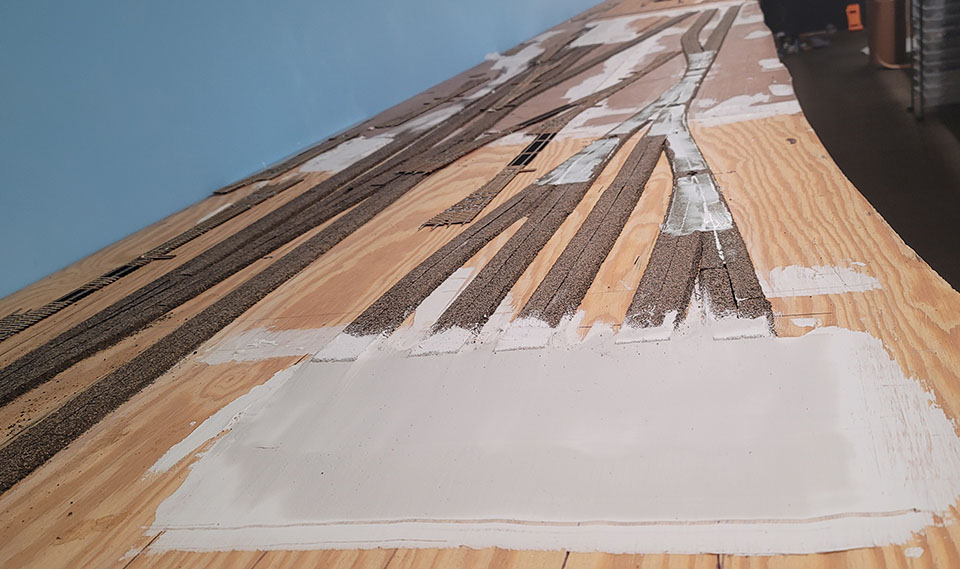
The track needs to have a gentle slope a foot before entering the engine house which has been moved a foot to the left of and the attached plan. The easiest way to get a nice, even slope without a lot of sanding is to use sheetrock mud. Fisrt layer was done with a 4″ knife and because of thickness usually shrinks and has some cracks. The ramp is lengthened using a 8″ and then 10″ sheetrock knife. They are dragged perpendicular to the roadbed just touching the end of the cork.
Yellow glue was used to hold down a 2′ x 3′ section of roll cork to see if better than white glue. Weight was used. Still a bubble and lifting edges. I did not want to use contact cement because of alignment.
There seemed to be no difference in the glues for this purpose. A 2′ x 4′ piece was glued down this morning. I put a lot more weight on the plywood sandwich. There was a slight warp in the 8′ plywood so it was allowed to hang 3.5′ off the end where there was on cork.